You say “Po-Tay-Toe” I say “Po-Tah-Toe”

FullSizeRender

It’s been all about the potato at school this past week!  Of course we began with using the starchy little gems for practicing knife skills (see my tourné skills above), but then we moved on to “Pomme Purée,” which is fancy talk for Mashed Taters people!  Can you say butter and cream?  I can.  Oh my word.  The silkiness, the yumminess… they’re so, so good when done well!  And there are definitely some tricks that I learned this week.  When I first talked with the fine folks at Le Cordon Bleu – Seattle, they told me school was going to be all about technique and so far I’m not disappointed.  I’m learning so much about so many things!  I want to share it all but I have to remember that not every detail is as interesting to the average person as it is to me.  Food Nerd Alert!  Ahem…I digress…

There are some basic things to know about making fantastic mashed potatoes — some I’ve heard of, some I hadn’t.  The general idea is to make a product so starchy and good that it can hold a piece of meat atop it and still maintain it’s shape.  Another way to test it is to see if it can hang upside-down on your spoon.  For a long time.  Yay… I passed the test.

IMG_5867

I’ll share all the tidbits from lecture just to be sure to cover all the bases.  1) Potatoes really DO need to be uniform in shape.  This is important so they cook evenly.  And the reason this matters is that if you have some smaller pieces that overcook they will begin to break down and take on a mealy consistency.  Ultimately I was told it’s all about keeping the integrity of the starch.  And moisture is the enemy of a good starchy potato!  2) Put your uniformly cut pieces of potato into a large pot and cover them with COLD water (and add a bit of salt).  3) Bring the potatoes just barely to a boil and then lower the temperature to a decent simmer.  You want to heat the potatoes evenly from the outside-in.  If they cook too quickly on the outside, then the middle won’t be done.  And then to get the middle done, the outside will start to fall apart… SO… no hard boiling allowed. Slow and steady wins the race.  4) Another tip that was given was to leave the potatoes alone.  You don’t want to constantly stir them or check them too often.  Let them do their thing.  When you think they’re close, pull out a potato and if the tip of your knife goes in easily, but not through the potato, you’re good to go.  5) Drain them well.  Remember it’s a war… and moisture is your enemy!  6) Keep the potatoes hot.  You don’t need to race but you don’t want your potatoes to get cold on you as you transform them into perfect, luscious, white mountains…YUMMMMMM… OK back to details.  7) You’ll want to have a saucepan ready with your warm cream and melted butter.  And don’t cheat with milk!  Milk is too watery (aka “Potato Enemy”), thus it creates a sub-par product.  8) My Chef Instructor recommends a ricer (his preference) but a food mill will work well too.  He said a mixer with the paddle attachment is only for those who are “experienced” because your “starchy dream” can quickly become one “stuck like glue.” (He didn’t mention an old school, hand-held potato masher and I forgot to ask… I think the drawback is the potatoes just aren’t as smooth… as I discovered tonight).  9) Add your fat component as you purée the potatoes — a little bit at a time. This seemed to keep them more velvety.

There you have it folks.  For some of you I’m sure this isn’t anything new but for me there were a number of things that I just wasn’t doing quite right. But from now on it’s going to be nothing but dreamy, creamy potatoes.  Tonight’s homework inspired a pretty tasty meal… Grilled Bacon-Wrapped Filets – topped with Blue Cheese Compound Butter, Sautéed Green Beans with Tomatoes, Sautéed Mushrooms and “Pomme Purée” (but they’ll always be Mashed Taters to me! :-))  And don’t be jealous or too impressed.  My steak was unevenly cooked, the potatoes were lumpy (I need a ricer!) and I was a hot mess by the time I sat down.  Just keepin’ it real.  Happy Potato Making!

FullSizeRender copy

I Survived My First Week Of Culinary School!

Yes.  That’s right.  I made the crazy decision to embark on a totally new path and go to culinary school at the age of 43.  I’ve got an almost freshman and senior in high school and now I’m in school too.  I even have a quiz on Monday.  What the heck!?!

I may delve into it more at some point, but the gist of my journey is that I’m a geek about food — how it’s prepared, cooking techniques and the art of the perfect bite.  And I had it pointed out to me (a number of times) that pursuing your passion is a good and worthy thing.  And I’m worth it.  That’s the hard part isn’t it?  Feeling like we’re worth it.  So I did something about it and signed up at Le Cordon Bleu in their Culinary Arts Program.  Really, it was kind of like ripping off a band-aid.  I just did it.  Deep down I knew it was the right move but I had to dig in for the courage and jump!

First Day of School at LCBThis is me on Day 1.  Nervous but mostly excited.  And thinking a little bit, “What in the world am I doing!?!?!” Gulp.  But you know what?  When you pursue something you’re genuinely excited about, I think it’s different.  I have LOVED my first week!  It hasn’t been anything like a glamorous Food Network show either.  I spent most of the week listening to lectures about Kitchen Brigades (the hierarchy of a kitchen), knife skills, lots and lots about how not to kill people with poor food safety and sanitation, weights and measurements, all the french words for the different types of knife cuts, costing, basic math for recipe conversion, and uniform expectations (it’s pretty specific — let’s just say I’ve never been so happy for a Saturday to wear regular clothes, a watch, my wedding ring and some dangle earrings!).  That might sound like a snooze-fest to many of you but I just love it!

My homework has consisted of lot’s of reading and knife skills.  You get a sweet chefs kit as a student with all the basic tools needed to get the chef party started!

The Kit IMG_5842I’m learning the difference between a julienne and an allumettés.  Did you know they were similar but different?  Have you heard of an allumettés?  Yeah.  Me neither.  Basically they’re both matchstick-type cuts (technically 1/8″ square by 2″ long)  BUT you don’t julienne a potato.  Say what?  Julienne is reserved for other things like carrots, but allumettés?  That’s a term specifically reserved for potatoes.  Okee-dokie.  But really, my chef instructor helped make it relative by saying if you go to work for a french trained chef and he/she says to “allumettés the potatoes” you sort of have to know what they’re talking about.  Like I said… I’m a geek for this stuff 🙂

At the request of quite a few friends, I’m hoping to blog about the ins and outs of my journey.  That is when I’m not practicing my tourné knife skills.  For realz.  Check it out… I think they will be the end of me!  I just ordered a special knife on Amazon tonight to aid in the process as I will need all the help I can get.

What’s your passion?  What’s holding you back from going for something?  All good things to ponder on this short journey called life.  Thanks for reading and encouraging me along the way already!  It’s going to be a fun year.

When Loved Ones Are No Longer Here

IMG_5026

There’s no way I can get through a Christmas without missing my mom… A LOT.  She sort of encompassed so much of what Christmas was about for me growing up.  Don’t get me wrong.  I knew the “Reason for the Season” but my mom was gifted in making everything feel special.  From the gazillion presents under the tree – each picked and wrapped with so much care and thought – to they way she decked out the house from top to bottom, to the silly Christmas sweaters, vests, socks, pj’s, bells around her neck, earrings… you name it.  She had the spirit!

My mom had a way of making Christmas feel even more “Christmasy” if that’s possible.  Among the many ways she loved on her family during the holidays, her baking stands out as one of the best things we enjoyed.  Her various cookies were always a treat but the favorite for me was her African Coffee Cake.  It just tastes like Christmas to me.  I can’t remember a Christmas morning that didn’t include her famous coffee cake (complete with red and green sprinkles… of course).  So now as a grown up with my own family, I make this yummy coffee cake every season to serve Christmas morning while we open presents.  The thing is… it’s taken on new meaning now that I don’t have my mom here with me anymore.  She’s been gone five Christmases now and while the absence isn’t so shockingly painful, she’s especially missed as I scoot around my kitchen in my pj’s measuring, mixing and pouring.  This morning as I made my African Coffee Cake I felt her presence so close.  And I know it’s because she’s still with me.  Smiling down.  Loving from afar.  Being proud.  I frankly can’t make this coffee cake without talking out loud to her at some point and getting teary.  It’s not that the coffee cake is magic or anything, it’s just that when we intentionally seek to connect with our loved ones that are no longer here, it brings their spirit and the memory of them closer.  Whether it’s baking or doing something that you know they loved or enjoyed, if you’re missing someone this season, find your way to feel close.  It feels like a way to bridge the achingly painful gap so many of us feel during Christmas.

Well, all this being said, you need to try my mom’s famous African Coffee Cake!  And by the way, I have no idea why it’s called “African Coffee Cake” or where she originally got the recipe.  I just know it rocks.  I hope and pray you can feel your loved ones close.  Their “fingerprints” are often closer than you think.  Merry Christmas to you and yours.

IMG_5022 IMG_5023


IMG_5024 IMG_5025

In case you can’t read from the photo…Which by the way is in my mom’s handwriting.  See… fingerprints 🙂

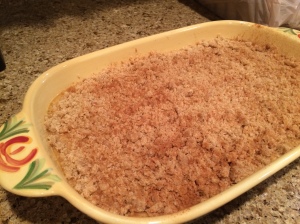
2 1/2 c flour, 3/4 c sugar, 1 c brown sugar, 1 T nutmeg, 1 tsp salt, 3/4 c vegetable oil — Mix all of this well. Remove 1 cup of the mixture and set aside.

Add in 2 eggs, 1 c buttermilk, 1 tsp baking soda, 1 tsp baking powder — Mix well and pour into a greased 9×13 baking dish.  Take 1 cup of “struesel” mixture and crumble evenly over the batter.  Bake at 300 for 35 minutes (mine always needs a few extra minutes… if the center is jiggly in the middle when you shake it, give it 3-4 more minutes).

Optional — top with chopped nuts and cinnamon.

Simplicity In A Crock

I love food that has layers to it, where all the things on the plate contribute to making the “perfect bite” in my mouth.  However, most of the time my life calls for simple.  Easy, quick and simple foods are what I tend to cook more often than not.  I dream of being the kind of person who whips up those meals that can create the “perfect bite” (“The Mirror Has Two Faces” anyone?  Barbra Streisand has a great scene in this movie about the perfect bite.  Love!).  In this stage of life, simple is where it’s at most of the time.

So, I’ll share two of my latest favorite go-to easy meals.  And they both involve the crock pot!  Don’t you just love a crock pot?  I know I do.  Besides the fact that it always reminds me of my mom (she LOVED her crock pot), I love the way it smells up the house and keeps you anticipating the yumminess that awaits you at the end of the day.

First… I bring you my Crock Pot Pork.  Two ingredients and some spices.  Yep.  That’s it.  And it’s super, super good.  Like “serve it to company” good.  It all starts with Pork Roast.  I get mine in a four-pack at Costco.  They’re super lean and fairly budget friendly.

IMG_4318

Take a large onion and slice it up.  Lay it in the bottom of your crock.  Next, place the pork roast on top of the onion.  And that’s it.  Really.  Oh, the spices… garlic powder, cumin, chili powder, salt, pepper, cayenne pepper and cinnamon.  I don’t measure my spices but I’ll guesstimate for you… 1 tsp garlic powder, 2 tsp each of cumin, chili powder and salt, 1 tsp black pepper, 1/2 tsp cayenne pepper and 1/2 tsp cinnamon.  The cinnamon sounds weird but it adds that little something.  Add maybe 1/2 cup water to get the juices going and cook on LOW for 8-10 hours.  Usually I throw this together in the morning and it’s ready by dinner.  The pork will fall apart when you try to shred it!  You can then serve it as is, use it for pork tacos, enchilada filling or add BBQ sauce and put it on some buns.  It’s super versatile!

IMG_4316

Next up…White Bean Chili.  I’ve tried a ton of variations of this and have honed in on this recipe as the Keeper.  It’s easy and the tasty factor is off the charts.  Part of that is because of the yummy things added once you put it in the bowl but I’ll get to that in a minute.

Begin with a frozen bag of chicken tenders.  I use a 2 1/2 pound bag from Trader Joe’s but you can adjust how much chicken you use.  This amount of chicken will give it a hardy, meaty texture.  You don’t have to thaw the chicken or anything!  Remember… easy is the key!  Next up is five cans of white beans (with the liquid), 1 can diced green chiles, a 16 oz jar of salsa (I go for a medium chunky salsa but you could do fresh salsa too), a 32 oz box of chicken broth and some spices — garlic powder, cumin, onion powder and salt & pepper to taste.

IMG_4546                  IMG_4547

Place the chicken in the crock pot, add the above mentioned ingredients and turn on LOW for 5-6 hours or so.  EASY!  When you’re ready to serve, remove the chicken tenders with tongs.  Shred them up BUT before you put the chicken back in the crock pot, take some of the white bean soup and blend it up.  This will give it a thick and rich texture.  I have a stick blender which makes things really simple but you could just ladle some of the soup into a blender and then add it back in.

IMG_4552              IMG_4551

Once you’ve shredded the chicken and blended some of the soup up, put it all back together and get ready to serve!  To put this soup over the top, add some fresh lime juice, shredded cheese, sour cream, fresh cilantro and crushed tortilla chips.  It really is SO delicious and a family favorite in our house.  Seriously.  I’ve made it twice in the last two weeks 🙂

IMG_4553

As my mom used to say… K.I.S.S. (Keep It Super Simple).  Happy Crock Potting People!

Easy Bake Ovens

So it’s only been like four months since my last entry? Whatevs.  This blogging thing pulls at all the painful places in me… why would anyone want to read what I have to say, who do I think I am blogging like an “expert” about something, I’m just a stay-at-home mom… blah, blah, blah.  I’m pretty good at avoiding myself, so I get “busy” with all sorts of things and the facing of “real” gets put on the back-burner (kitchen pun — score!).  Can anyone relate?  Sometimes I feel like I limit myself to using an Easy Bake Oven when I’m totally designed for and deserve to use a six-burner Viking Range.  Being in pits of self-doubt and contempt will do that to you… convince you that bread crumbs are delicious when a four-course meal is much more in line with what you want and what you need. 

Well, I’m attempting to try and start this thing up again with freedom to just get whatever “it” is out there.  I took lots of pictures of great food over the summer that have yet to make it on here.  I’ll start with one of my favs… Mac & Cheese Muffins.

It was a gray summer day and I wanted to do something creative for the kids lunch but didn’t have lot’s on hand.  I remembered a recipe I read about in my favorite food book “Bread & Wine” by Shauna Niequist (I mentioned this book in my first blog… it really is awesome!).  Her recipe was for “Mini Mac & Cheese” appetizers.  They sounded so good and pretty easy to make.  I decided to make mine in regular muffin tins (hers called for mini muffin tins) so they’d be more substantial for lunch.  The amount made was perfect for 12 mac & cheese muffins.  They were a huge hit with the kids and great served with a salad or just raw veggies and ranch.

I realize that whether I’m creating something elaborate and complicated or something simple and basic, I’m not limited to the Easy Bake Oven’s in life.  My options and abilities exceeded that stage a long time ago… and I’m not talking about what it is that I make as much as I’m talking about how I allow myself to dream and want and need.  Obviously I’m still working this all out but awareness is where I’m beginning.  Thankfully I get to still play all I want.  I just get to do it now as a grown up.  And for that I am grateful.

IMG_3379

MAC & CHEESE MUFFINS (via “Bread & Wine” by Shauna Niequist

1/2 lb elbow macaroni (or 4 cups cooked)

2 cups sharp cheddar cheese, shredded

2 T butter, plus more for the muffin tins

1 T dijon mustard

2 dashes Tabasco or hot sauce of your choice

1/2 tsp salt

1 egg yolk

1/2 cup grated parmesan cheese

Cook the macaroni al dente… just a touch firmer than you’d eat it.  Drain.  Brush the muffin tins with melted butter, then sprinkle half the grated parm into the muffin cups.  It’ll be a light dusting.

On medium-low heat, warm the 2 T of butter and cheese and whisk until smooth.  It’ll seem like a greasy glob but don’t worry, it’ll work out just fine.

Off heat, add dijon mustard, Tabasco, egg yolk and whisk again. 

Add macaroni and mix until well coated with cheese.  Again, it’ll seem a bit globby but it’ll work out!  I promise 🙂

Spoon into muffin cups and pack them lightly.  Top with grated parm cheese that’s left.

Bake at 425 for 12-14 min until golden on top.

Let them cool at least 10 minutes before serving because they’ll set-up in the muffin tins and then be easier to get out.  Serve them warm or at room temp.  Really, any way you serve them, they’ll be delicious!  Enjoy 🙂

Stuff I make up…

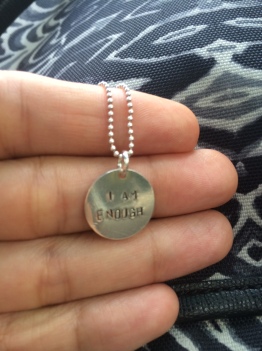
Let me start by saying thanks for all the positive encouragement about starting this blog!  I just sort of jumped in post-counseling one day and then went, “Ahhh!  What have I done!?!”  The pressure to sound funny and smart, all while offering something worthwhile and not boring initially got to me.  And then it occurred to me that I make up a whole lot of stuff that probably isn’t true.  If it’s boring, you don’t have to read it.  If you don’t think I’m funny, there’s always Jimmy or Ellen to watch, right?  All that said, in my pursuit to figure this blog thing out, I’ve realized I just need to be me.  I am enough.  It’s a slogan I’m focusing on for myself… I even have a necklace that says it!

necklace

In the spirit of making stuff up, I thought I’d share a yummy lunch that I made up recently…

I love the challenge of opening my fridge and figuring out something delicious to make with whatever I’ve got in there.  A few weeks ago that consisted of some old bread sticks from the local, cheap pizza place, an almost too old zucchini and some mushrooms that were barely hanging on.  How in the world would that make a tasty lunch?  Oh just wait for it.  Here’s a glimpse into my thoughts that day…

“Hmmm.  Bread sticks.  Old but could be useful.  Oooooh!  I could make croutons.  YES!!!!  I LOVE croutons!  I love bread.  Yum.  OK.  I need some veggies because, well, I need to stop eating so many carbs.  That zucchini looks borderline gross.  Well, if I scrub a bit here and there I could salvage it.  Those damn mushrooms!  Why do I keep buying them?  I’m the only one who likes them!  I’ll just ignore their shriveling appearance and slice what I can up and see where we’re at.  Bread and veggies.  I need something to bring it all together… (insert my light bulb idea) YES!  There’s that yummy marinara from Costco out in the garage pantry.  Saute veggies, add garlic, marinara… serve over croutons?!?  Why not!  That’s sort of like a pizza right? Or is it more like a hot bread salad?  Whatever, it involves croutons.”

And there you have it.  A short trip into my weird little mind 🙂  So to summarize, here’s what I did to make a seriously delicious lunch…

1) Cube the bread sticks into small, one-inch pieces.  Toss liberally with olive oil.  Use garlic powder, salt and pepper generously and then spread it all on a sheet pan and bake at 350 degrees for 10-15 minutes depending on how toasty you want it.  Stir it every 5 minutes or so to get better, more even browning.

2) Chop/slice up your veggies.  In this case, I used my sad little zucchini and some mushrooms but you could use whatever you’ve got or whatever sounds good.  Put a little olive oil in a skillet and saute over medium heat.  Again garlic, salt and pepper.  I love to experiment with spices so you could throw in some oregano or basil if you wanted to.  I usually use fresh garlic but I was hungry so garlic powder can work just fine in it’s place if you’re in a hurry (and I was!!).  Add the marinara of your choice.  I am in LOVE with Dave’s Gourmet Organic Marinara!  It’s sort of expensive in the grocery store but at Costco it’s a deal.  When they carry it, I stock up!

pasta

3) Take fresh, toasted croutons and put them in the bottom of a bowl (after you munch on a few first of course!!!).  Top with the veggie/marinara mixture.  Finish with some fresh parmesan cheese.  SO GOOD!!!!

Making up stuff can sometimes not be so good (like the stuff I make up about what people think of me AND sometimes the food I create out of the blue).  HOWEVER, making up stuff can also sometimes lead to something amazing.  Out of the box.  Tasty beyond what you imagined!  Give it a whirl.  Open your fridge and see what combos you can make!  I’d love to hear about it… good or bad 🙂


You’ve got to start somewhere…

I’ve been dragging my feet for years and years about doing something with my love of food and here I am.  A 41… almost 42 year old who’s still trying to figure out what I want to be when I grow up!  I’ve loved food since forever and actually had a reputation with my friends in high school for being “the most enthusiastic person” when it comes to talking about food.  I just love it.  The tastes, textures, smells, the way it makes you feel, remember, recall times gone by.  All of it.  I’m not professionally trained by any means but if you could get a degree from watching cooking shows then I’d have my masters by now.

I love to make stuff up.  It usually works out but certainly fails from time to time.  One thing I love but don’t do too often is bake.  My mom was a baker.  She made treats all the time and gave them to people.  I realized recently that I don’t bake for fear of NOT giving it away and eating it all.  But I long to make all sorts of things but fear the repercussions.  Can anyone relate here!?!  It’s such a love-hate thing.  I’m working on moderation in all areas of my life so my counselor recently asked me to consider baking and ENJOY it for what it is.  It doesn’t have to be an all or nothing thing… i.e. I can bake and NOT eat the whole pan…versus never baking at all.  I’ve typically gone with the latter and I’ve got a stack of recipes a mile long that I’m dying to try!

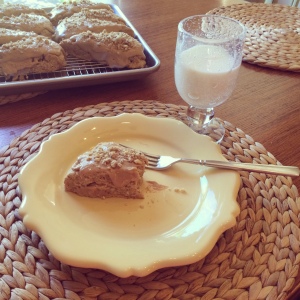
Today I’m changing that!  I just pulled out of the oven fresh, hot Maple Oat Nut Scones!!!!! Can you sense my enthusiasm!?!?  Seriously.  The smell.  The layers of butter.  It’s literally making my mouth water.  And I’m not even done yet!  After they cool, I will “ice” them with a maple, coffee, sugar glaze.  I know right?  Crazy good!  I’ve been longing for these babies for a looooong time!  Starbucks used to carry scones like these in their pastry case but discontinued them years ago.  Then, once while in Arizona, I discovered they still sold them down there!  Bliss!!  However, on my most recent trip to AZ, no more Maple Scones 😦  So I did a little research and one of my favorite food bloggers, The Pioneer Woman, makes a copy-cat recipe http://thepioneerwoman.com/cooking/2014/03/maple-oat-nut-scones/ I’ve always loved P-Dub but after the discovery of her delicious Maple Oat Nut Scones…let’s just say I feel we’ve gone to a whole new level of friendship.

See the layers of "white" -- those aren't white chocolate chips.  Butter.  Sweet butter.

See the layers of “white” — those aren’t white chocolate chips. It’s butter. Sweet, sweet butter.

Sweet satisfaction.  Buttery, flakey, crisp yet tender.  And super mapley.  Yum!

Sweet satisfaction. Buttery, flakey, crisp yet tender. And super mapley. Yum!

Let this entry mark the beginning of a journey…of writing down my thoughts, discoveries, joys and mess-ups with food, life and all the things in-between.  OK.  It’ll mostly be about food but I don’t want to pigeon-hole myself 😉